


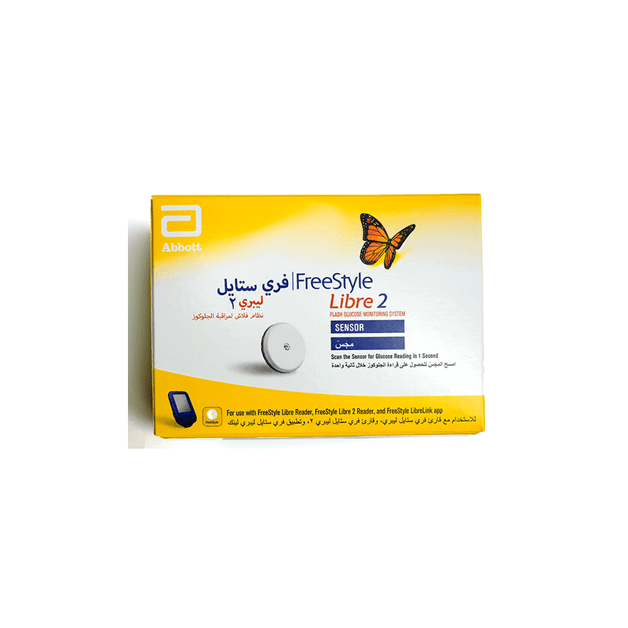
FREE STYLE LIBRE-2 B/G SENSOR


The FreeStyle Libre 2 Flash Glucose Monitoring System Reader (“Reader”) when used with a FreeStyle Libre 2 Flash Glucose Monitoring System Sensor (“Sensor”) is indicated for measuring interstitial fluid glucose levels in people (age 4 and older) with diabetes mellitus, including pregnant women.
- he Reader and Sensor are designed to replace blood glucose testing in the self-management of diabetes, including dosing of insulin.
- The indication for children (age 4 - 12) is limited to those who are supervised by a caregiver who is at least 18 years of age.
- The caregiver is responsible for managing or assisting the child to manage the Reader and Sensor and also for interpreting or assisting the child to interpret Sensor glucose readings.
- The FreeStyle Libre 2 Flash Glucose Monitoring System (“System”) has two main parts: a handheld Reader and a disposable Sensor that you wear on your body.
- You use the Reader to wirelessly scan the Sensor and display your glucose readings.
- The Reader only works with FreeStyle Libre 2 Sensors and cannot be used with other Sensors.
- The FreeStyle Libre 2 Sensor automatically communicates with the Reader and can give you glucose alarms if you choose to turn those on.
- The Reader also has a built-in meter for blood glucose and ketone testing.
- Your System comes in a Reader Kit and a Sensor Kit.
- When opening your kits, check that the contents are undamaged and that you have all parts listed.
- If any parts are missing or damaged, contact Customer Service.
- When in range of the Reader, your Sensor automatically communicates with the Reader to give you Low and High Glucose Alarms if you turn them ON.
- These alarms are turned OFF by default.
- This section explains how to turn on and set alarms as well as how to use them.
- Please read all the information in this section before setting and using alarms.
IMPORTANT: What to know about glucose alarms
- Scan your Sensor often to check your glucose. If you get a Low or High Glucose Alarm, you must obtain a glucose result to determine what to do next.
- The Low and High Glucose Alarms should not be used exclusively to detect low or high glucose conditions. The glucose alarms should always be used along with your current glucose, glucose trend arrow, and glucose graph.
- Low and High Glucose Alarm levels are different from your Target Glucose Range values. Low and High Glucose Alarms tell you when your glucose has passed the level you set in the alarm. Your Target Glucose Range is displayed on glucose graphs on the Reader and used to calculate your Time In Target.
How to use:
- FreeStyle LibreLink – SA
- Approved for use with FreeStyle Libre and FreeStyle Libre 2 sensors
- The FreeStyle LibreLink app is approved for use with FreeStyle Libre and FreeStyle Libre 2 sensors. Now you can check your glucose by scanning your sensor with your phone or use FreeStyle Libre 2 sensors to receive alarms when your glucose is low or high.
You can use the FreeStyle LibreLink app to:
- * View your current glucose reading, trend arrow and glucose history
- * Receive low or high glucose alarms with FreeStyle Libre 2 sensors [2]
- * See reports, such as Time in Target and Daily Patterns
- * Share your data with your doctor and family, with your permission
SMARTPHONE COMPATIBILITY
- Compatibility may vary between phones and operating systems.
- USING YOUR APP AND READER WITH THE SAME SENSOR
Alarms can only be issued on your FreeStyle Libre 2 reader or your phone (not both).
To receive alarms on your phone, you must start the sensor with the app. To receive alarms on your FreeStyle Libre 2 reader, you must start the sensor with your reader.
Once the sensor has been started with the reader, you can also scan that sensor with your phone.
Applying Your Sensor:
1. Apply Sensors only on the back of your upper arm. Avoid areas with scars, moles, stretch marks, or lumps. Select an area of skin that generally stays flat during your normal daily activities (no bending or folding). Choose a site that is at least 2.5 cm (1 inch) away from an insulin injection site. To prevent discomfort or skin irritation, you should select a different site other than the one most recently used.
2. Wash application site using a plain soap, dry, and then clean with an alcohol wipe. This will help remove any oily residue that may prevent the Sensor from sticking properly. Allow site to air dry before proceeding.
Note: The area MUST be clean and dry, or the Sensor may not stick to the site.
3. Open the Sensor Pack by peeling the lid off completely. Unscrew the cap from the Sensor Applicator and set the cap aside.
CAUTION: Do NOT use if the Sensor Pack or the Sensor Applicator seem to be damaged or already opened. Do NOT use if past expiry date.
4. Line up the dark mark on the Sensor Applicator with the dark mark on the Sensor Pack. On a hard surface, press down firmly on the Sensor Applicator until it comes to a stop.
5. Lift the Sensor Applicator out of the Sensor Pack.
6. The Sensor Applicator is prepared and ready to apply the Sensor.
CAUTION: The Sensor Applicator now contains a needle. Do NOT touch inside the Sensor Applicator or put it back into the Sensor Pack.
7. Place the Sensor Applicator over the prepared site and push down firmly to apply the Sensor to your body.
CAUTION: Do NOT push down on the Sensor Applicator until placed over prepared site to prevent unintended results or injury.
8. Gently pull the Sensor Applicator away from your body. The Sensor should now be attached to your skin.
Note: Applying the Sensor may cause bruising or bleeding. If there is bleeding that does not stop, remove the Sensor, and apply a new one at a different site.
9. Make sure the Sensor is secure after application. Put the cap back on the Sensor Applicator. Discard the used Sensor Pack and Sensor Applicator. See Disposal section.

Starting Your Sensor:
1. Press the Home Button to turn on the Reader.
2. Touch Start New Sensor.
3. Hold the Reader within 4 cm (1.5 inches) of the Sensor to scan it. This starts your Sensor. If sounds are turned on, the Reader beeps when the Sensor has been successfully activated. The Sensor can be used to check your glucose after 60 minutes.
Note: If the Sensor is not successfully scanned within 15 seconds, the Reader displays a prompt to scan the Sensor again. Touch OK to return to the Home Screen and touch Start New Sensor to scan your Sensor.
Checking Your Glucose:
1. Turn the Reader on by pressing the Home Button or touch Check Glucose from the Home Screen.
2. Hold the Reader within 4 cm (1.5 inches) of your Sensor to scan it. Your Sensor wirelessly sends glucose readings to the Reader. If sounds are turned on, the Reader beeps when the Sensor has been successfully scanned. Note: If the Sensor is not successfully scanned within 15 seconds, the Reader displays a prompt to scan the Sensor again. Touch OK to return to the Home Screen and touch Check Glucose to scan your Sensor.
3. The Reader displays your current glucose reading along with your glucose graph and an arrow indicating the direction your glucose is going.
FreeStyle LibreLink – SA
Approved for use with FreeStyle Libre and FreeStyle Libre 2 sensors
The FreeStyle LibreLink app is approved for use with FreeStyle Libre and FreeStyle Libre 2 sensors. Now you can check your glucose by scanning your sensor with your phone or use FreeStyle Libre 2 sensors to receive alarms when your glucose is low or high.

You can use the FreeStyle LibreLink app to:
* View your current glucose reading, trend arrow and glucose history
* Receive low or high glucose alarms with FreeStyle Libre 2 sensors [2]
* See reports, such as Time in Target and Daily Patterns
* Share your data with your doctor and family, with your permission
SMARTPHONE COMPATIBILITY
Compatibility may vary between phones and operating systems. Learn more about compatible phones at http://FreeStyleLibre.com.
USING YOUR APP AND READER WITH THE SAME SENSOR
Alarms can only be issued on your FreeStyle Libre 2 reader or your phone (not both). To receive alarms on your phone, you must start the sensor with the app. To receive alarms on your FreeStyle Libre 2 reader, you must start the sensor with your reader. Once the sensor has been started with the reader, you can also scan that sensor with your phone.
Caution & Warnings:
Contraindications:
- The Sensor must be removed prior to Magnetic Resonance Imaging (MRI).
WARNING:
- Do not ignore symptoms that may be due to low or high blood glucose. If you have symptoms that do not match the Sensor glucose reading or suspect that your reading may be inaccurate, check the reading by conducting a fingerstick test using a blood glucose meter. If you are experiencing symptoms that are not consistent with your glucose readings, consult your health care professional.
- The FreeStyle Libre 2 Flash Glucose Monitoring System (“System”) contains small parts that may be dangerous if swallowed.
Cautions and Important System Information:
What the System has not been evaluated for:
- The System has not been evaluated for use with other implanted medical devices such as pacemakers.
- The System has not been evaluated for use in persons on dialysis or people less than 4 years of age.
How to store the Sensor:
- Store the Sensor Kit between 4°C and 25°C.
- While you don’t need to keep your Sensor Kit in a refrigerator, you can as long as the refrigerator is between 4°C and 25°C.
When is Sensor Glucose different from Blood Glucose:
- Glucose levels in the interstitial fluid can be different from blood glucose levels and may mean that Sensor glucose readings are different from blood glucose.
- You may notice this difference during times when your blood glucose is changing quickly, for example after eating, taking insulin, or exercising.
When to remove the Sensor:
- On rare occasions, you may get inaccurate Sensor glucose readings. If you believe your glucose readings are not correct or do not match how you feel, perform a blood glucose test on your finger to confirm your glucose. If the problem continues, remove your Sensor and apply a new one.
- Some individuals may be sensitive to the adhesive that keeps the Sensor attached to the skin. If you notice significant skin irritation around or under your Sensor, remove the Sensor and stop using the System. Contact your health care professional before continuing to use the System.
- If you have a medical appointment that includes strong magnetic or electromagnetic radiation, for example an X-ray, MRI (Magnetic Resonance Imaging), or CT (Computed Tomography) scan, remove the Sensor you are wearing and apply a new one after the appointment. The effect of these types of procedures on the performance of the system has not been evaluated.
What to know about wearing the Sensor:
- Do not reuse Sensors. The Sensor and Sensor Applicator are designed for single use.
- Reuse may result in no glucose readings and infection. Not suitable for re-sterilisation.
- Further exposure to irradiation may cause inaccurate results.
What to know about Glucose Alarms:
- For you to receive alarms, they must be turned ON and you should ensure that your Reader is within 6 metres (20 ft) of you at all times.
- The transmission range is 6 metres (20 ft) unobstructed. If you are out of range, you may not receive glucose alarms.
- To prevent missed alarms, make sure the Reader has sufficient charge and that sound and/or vibration are turned on.
Interfering Substances:
- You can take standard doses of ascorbic acid (vitamin C) and still make treatment decisions with the Sensor.
- Taking higher than the maximum recommended daily allowance (RDA) of ascorbic acid may affect the Sensor readings and make them look higher than they really are.
| Shipping Type | Express |
|---|


The largest selection of casino games and sports bets at 1xbet app.